Using the Map Wizard
These are the steps to create a new map from an existing dataset (one that has already been uploaded). If you want to create a map on a new dataset then please see the upload guide.
- Choose the dataset
-
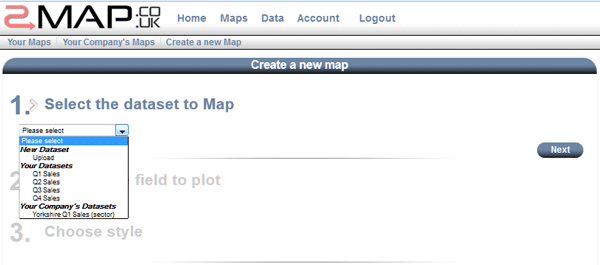
Click on the dropdown to see the list of datasets to plot.
Choose one of the datasets under 'Your Datasets'.
If you are a subscribing customer then you could choose one from under 'Your Company Datasets' instead.
The 'Upload' option is for creating a map based on a new dataset.
- Click 'Next'
-
If it is a record level dataset that you are plotting then there will be an extra 'level conversion' step at this point.
If the data is summarised (at Area, District or Sector level) then you will be taken to the last steps of the map creation wizard.
You will see the name of your dataset and the level of data it contains.
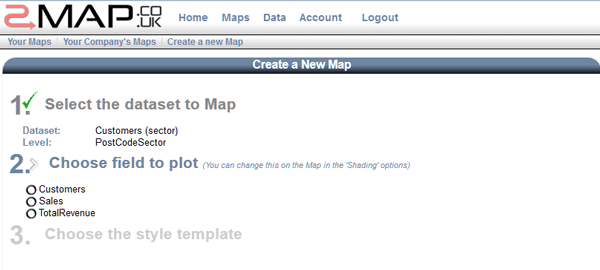
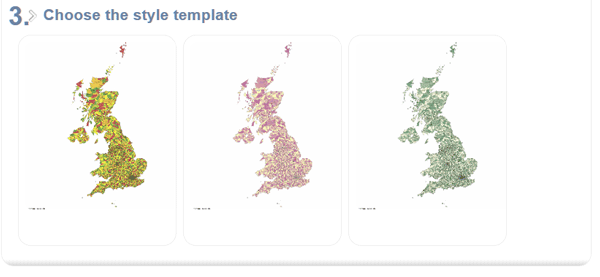
- Choose the field to plot
-

If there are multiple columns/fields in your dataset then you will need to select which one to plot by clicking on it.
If you click on the wrong one just click on the right one after it and the selected field will change.
If there is just one field then it will be selected for you and this step will be skipped.