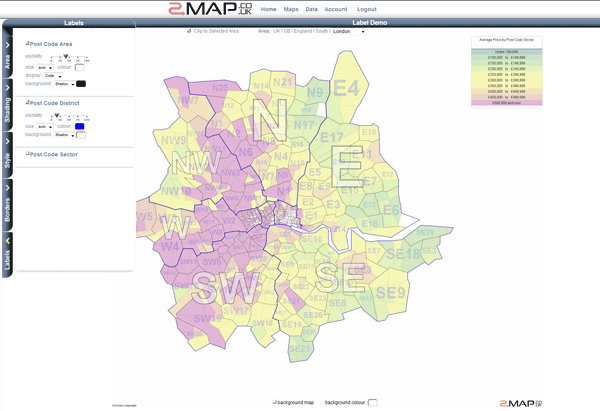
Labels
All Postal Areas, Districts and Sectors have labels. You can change the settings of each to determine if they are displayed and how.
- Click on the 'Labels' tab
-
This will bring up the label options window.
- Change the settings
-
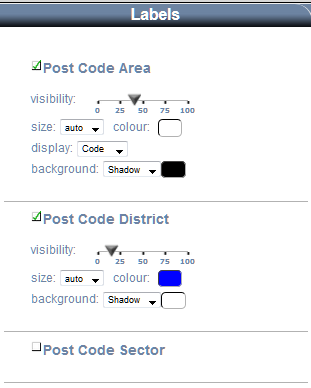
The check box (next to the layer name) sets whether the label is drawn or not. When viewing the entire country it looks better if you turn off the district and sector labels.
The 'Visibility' slider sets how opaque the label is. The values of around 15% give a nice water mark effect, as the transparency allows other features to show.
Choose the size of the font from the 'size' dropdown; 'auto' will fit the label within the bounds of the feature.
Click on the colour swatch to change the colour of the text.
The 'display' dropdown menu allows you to choose what is displayed as the label. This can be the code or the name of the area, the value for the area or a combination of the code and value. The 'value' option only appears if the dataset being plotted/shaded is at the same level/granularity as the layer that you are setting labels for.
Select the background style from the dropdown. The 'Outline' option draws an outline of the text, this is useful if the underlying map is a similar colour to the label colour.
Click on the background colour swatch to change the colour of the background.